
The MG Kämpfer has sat in my backlog pile for quite some time. It's a unique and well-liked mobile suit, though the kit itself is pretty old, having been released in 2001. Nevertheless, as one of the standout mecha designs from one of my favorite Gundam installments, Mobile Suit Gundam 0080: War in the Pocket, it was on my short list of potential next projects.
After flirting with candy coats in small details in some of my previous kits, I felt it was time to do a full candy finish. The large curves of the Kämpfer make for a perfect canvas for this technique. I looked at the incredible work of Jenic, who produced this spectacular candy / chrome Kämpfer several years ago, as inspiration. I took many cues from Jenic's work, though I ultimately wanted to make the design my own, and I'd like to think I accomplished this.
Paints Used:
Gaianotes
- Neutral Gray III
- Neutral Gray IV
- Neutral Gray V
- White
- Star Bright Duralumin
- Star Bright Iron
- Gunmetal
- Clear Red
- Clear White
- Clear Blue
- Gloss Black Base > Chrome for Plastic
- Bright Silver Candy Base
- Candy Electric Blue
- Candy Cobalt Blue
- Copper
- Copper
- Flat Steel
- Stop Light Red Metallic
- Decals sourced from eBay
- Scribing done with a Madworks 0.2mm chisel
- Tamiya Panel Line Accent Color for panel lining
- Vallejo Model Color for hand-painting of pilot figures
- Mr. Color UV Cut top coats (Flat and Gloss)


Turns
I tested out several different candy products and ultimately settled on using the most straightforward one (Alclad II Bright Silver Candy Base > Gaianotes Clear Blue) for the bulk of the kit. I did also use two of Alclad II's blue candy paints, but I found them more difficult to work with due to their increased volatility and slower dry time, plus their finish wasn't any better looking in the end. I wouldn't use them again vs standard lacquer clear colors unless I really wanted those particular hues on a kit.

Weapons
As always, I worked on the weapons and accessories first. I learned long ago that it's a real drag to experience the excitement of finishing a mobile suit only to then need to work on the weapons. Better the opposite order. These took about a month from start to finish (as long as the mobile suit itself), though that was partly due to some time spent waiting for paint and other supplies to arrive in the mail.
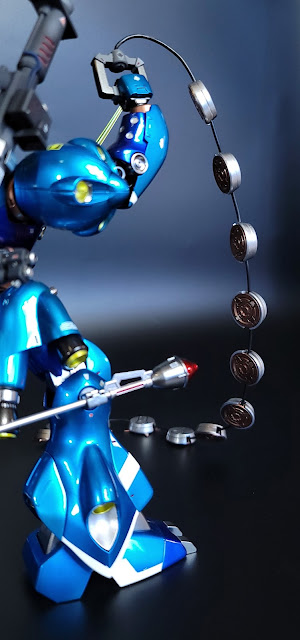
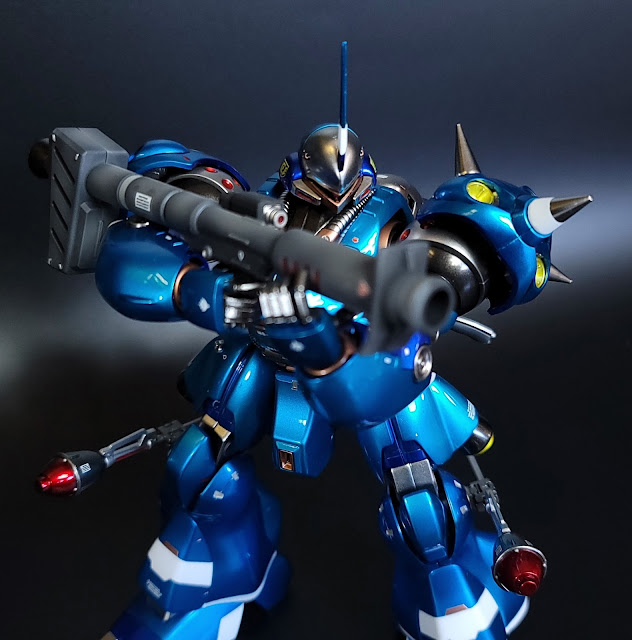
The bazookas (or "Giant Baz" according to the instruction manual) and shotguns were relatively straightforward, requiring a bit of masking but nothing too tricky, though I did spend a lot of time hand-detailing these pieces, particularly the shotguns. The Chain Mine is a novel weapon with a unique build. Jenic's approach helped me wrap my head around how to paint the mines, though I opted for a different color palette. I also used a similar design to Jenic's on the Sturm Fausts, although, like the Chain Mine, I decided to avoid the use of gold, as I preferred other metallic colors.


The MG Kämpfer was a real labor of love. Getting the candy finish right and working through the quirks of the Chrome paint were just two of the challenges. There were others, like the masking for the matte white areas, and general human error, like scribing the wrong area or accidentally putting on a decal upside-down. Once all combined, though, I think this kit shines (literally and figuratively), and served as a useful and (mostly) fun learning experience.
extraordinaire work !
ReplyDelete