
After completing my first Master Grade, the RX-78-02 Gundam: The Origin, I felt it only natural for my second MG to be a Zaku II. I couldn't decide between the standard Zaku II and Char's custom model, so I said screw it - why not both?
I worked on these two kits simultaneously for about two months (though I could likely have finished a fair bit earlier if I hadn't taken my time). It was very useful to do them side-by-side, as the pieces are almost identical, and therefore required less planning across both - for instance, I only had to do one test build.
It was a really fun experience, helped by the fact that I completed the weapons before anything else (I often feel like the weapons are a slog coming at the end). I used mostly the same techniques as on the RX-78-02, though I experimented with some new products, like Alclad II Gloss Black Base and Chrome. I also switched from Testors enamels to Vallejo Model Color acrylics for the hand-painting (just wanting to work cleaner).
I did pre-shade both these kits, though you may not notice it given that I try to be very subtle with my pre-shading and the weathering hides a lot of it.
I also used a new photo booth setup to record my work. I ditched the cheap old photo cube I'd been using and set up a big piece of black photo paper. It was glossier than I wanted, but overall I think it's a big improvement vs the fabric background of my previous setup. Still, it's limiting to use a smartphone to take the shots, even one with a great camera like my Galaxy Note 20 Ultra.
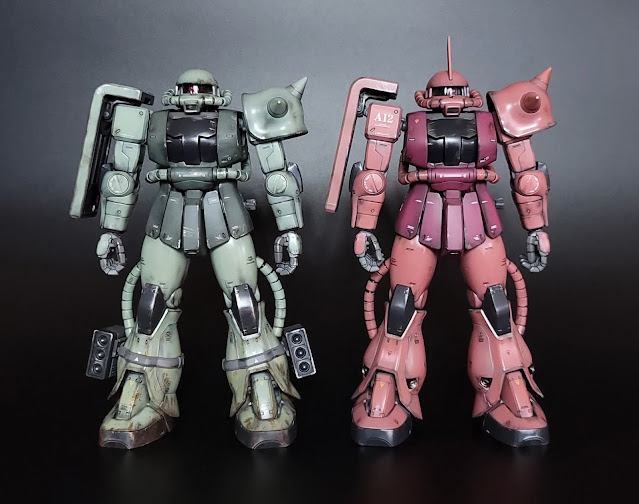


Turns - Zaku II / Char's Zaku II

Zaku II upper body detail - this kit comes with a mix of dry transfer decals and stickers. I ordered third party waterslide decals to replace the stickers, but I accidentally purchased ones that were larger than the appropriate scale. Rather than waiting another month for replacements, I opted to just use the stickers - never the best, but not the worst either.


Missile Pods - this is the MS-06J Zaku II specifically, which means it's designed for ground combat. The missile pods are one of my favorite pieces of gear, and I worked hard to make them stand out. I'm very happy with the effect of the Alclad II Chrome on the warheads, which contrasts with the flat metal of the surrounding casing.

Shield detail - lots of weathering going on here. The bit of Tamiya Flat Aluminum dry brushing really goes a long way toward adding realism.

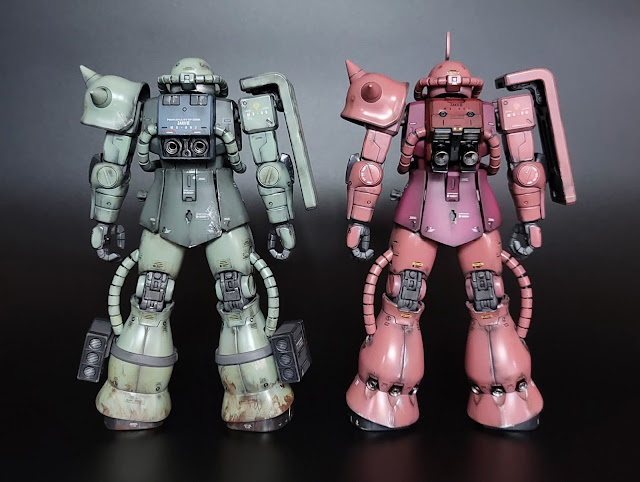
Backpack detail - more Alclad II Chrome, this time on the interior of the thruster bells. I love the decals here.

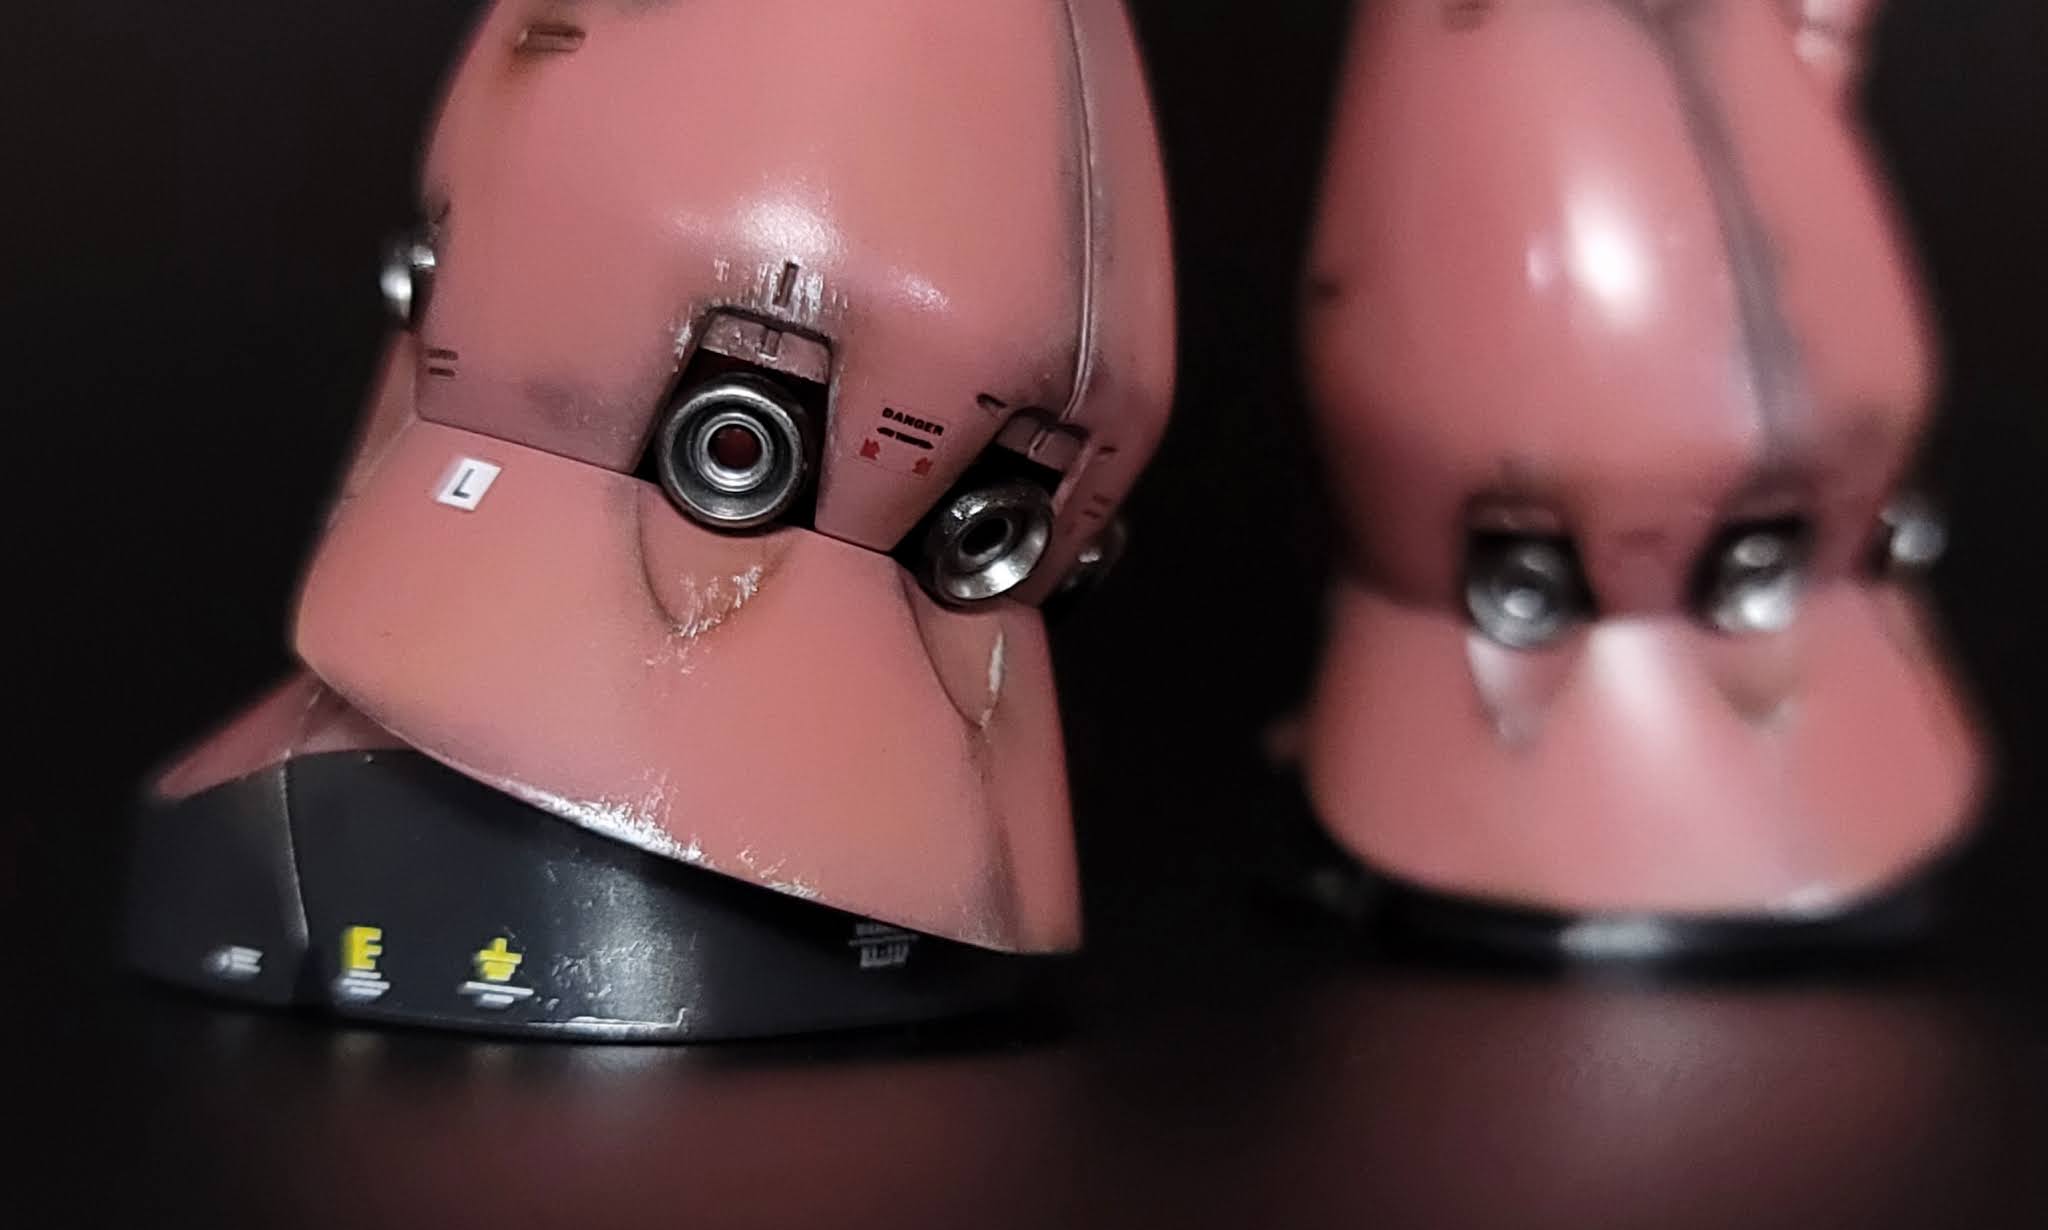
Head detail - the mono eye is candy coated with Gaianotes Clear Red and a bit of Clear White. It looks nicer in person - the photo lighting didn't pick it up quite as well. I'm very happy with that strategically placed bit of weathering on the upper visor, off-center.

Detail of Zeon pilot - I think this little guy came out great. Unlike my Amuro Ray pilot figure on the MG RX-78-02, I used an enamel wash on the four figures in this project and it made a world of difference. Unfortunately, the pilots are very difficult to see inside these hulking Zakus, so I had to shoot super close up with flash, which doesn't provide the best photo.

Char's Zaku II upper body detail - for this kit, I did have the correctly sized waterslide decals, so I didn't need to use any stickers.

I wanted Char's mobile suit to feature less weathering than the grunt Zaku II, reasoning that Char was an ace pilot and would have been banged up less. Still, some weathering adds a degree of realism. I also added the extra yellow and black decal strip on the bottom of the shield, which looks awesome, if I may say so myself.


Foot details - again knowing that Char was special and piloted a custom mobile suit, I chose to fancy it up a bit with chrome thruster bells. Actually, the interior is chrome with a red candy-coated core and gun metal exterior. I do wish I had added a bit more weathering beneath each thruster to give the illusion of scorch marks.
I worked on these two kits simultaneously for about two months (though I could likely have finished a fair bit earlier if I hadn't taken my time). It was very useful to do them side-by-side, as the pieces are almost identical, and therefore required less planning across both - for instance, I only had to do one test build.
It was a really fun experience, helped by the fact that I completed the weapons before anything else (I often feel like the weapons are a slog coming at the end). I used mostly the same techniques as on the RX-78-02, though I experimented with some new products, like Alclad II Gloss Black Base and Chrome. I also switched from Testors enamels to Vallejo Model Color acrylics for the hand-painting (just wanting to work cleaner).
I did pre-shade both these kits, though you may not notice it given that I try to be very subtle with my pre-shading and the weathering hides a lot of it.
I also used a new photo booth setup to record my work. I ditched the cheap old photo cube I'd been using and set up a big piece of black photo paper. It was glossier than I wanted, but overall I think it's a big improvement vs the fabric background of my previous setup. Still, it's limiting to use a smartphone to take the shots, even one with a great camera like my Galaxy Note 20 Ultra.
- Fully Painted - Gaianotes lacquers for all airbrushing; Vallejo Model Color for hand-detailing; Alclad II Gloss Black Base and Chrome for candy coating
- Decals - a mix of included dry transfer decals and stickers, as well as third party waterslides purchased from eBay
- Weathering - Tamiya Weathering Master sets
- Dry Brushing - Tamiya Flat Aluminum, Vallejo Model Color
- Top Coats - Gaianotes 030 Semi-Gloss Clear on light-colored and dark gray armor; Gaianotes Ex-04 Clear Flat on inner frame, dark-colored armor, and everything else


Turns - Zaku II / Char's Zaku II

Zaku II upper body detail - this kit comes with a mix of dry transfer decals and stickers. I ordered third party waterslide decals to replace the stickers, but I accidentally purchased ones that were larger than the appropriate scale. Rather than waiting another month for replacements, I opted to just use the stickers - never the best, but not the worst either.


Missile Pods - this is the MS-06J Zaku II specifically, which means it's designed for ground combat. The missile pods are one of my favorite pieces of gear, and I worked hard to make them stand out. I'm very happy with the effect of the Alclad II Chrome on the warheads, which contrasts with the flat metal of the surrounding casing.

Shield detail - lots of weathering going on here. The bit of Tamiya Flat Aluminum dry brushing really goes a long way toward adding realism.

Backpack detail - more Alclad II Chrome, this time on the interior of the thruster bells. I love the decals here.

Head detail - the mono eye is candy coated with Gaianotes Clear Red and a bit of Clear White. It looks nicer in person - the photo lighting didn't pick it up quite as well. I'm very happy with that strategically placed bit of weathering on the upper visor, off-center.

Detail of Zeon pilot - I think this little guy came out great. Unlike my Amuro Ray pilot figure on the MG RX-78-02, I used an enamel wash on the four figures in this project and it made a world of difference. Unfortunately, the pilots are very difficult to see inside these hulking Zakus, so I had to shoot super close up with flash, which doesn't provide the best photo.

Char's Zaku II upper body detail - for this kit, I did have the correctly sized waterslide decals, so I didn't need to use any stickers.

I wanted Char's mobile suit to feature less weathering than the grunt Zaku II, reasoning that Char was an ace pilot and would have been banged up less. Still, some weathering adds a degree of realism. I also added the extra yellow and black decal strip on the bottom of the shield, which looks awesome, if I may say so myself.

Foot details - again knowing that Char was special and piloted a custom mobile suit, I chose to fancy it up a bit with chrome thruster bells. Actually, the interior is chrome with a red candy-coated core and gun metal exterior. I do wish I had added a bit more weathering beneath each thruster to give the illusion of scorch marks.

Shoulder armor detail.


Backpack detail - here you can more clearly see the thruster bells.

Head detail - I have to say, the tube pieces all over these kits were both worse and better than I expected, if that makes sense. My fingers were pretty chapped at the end! I received a lot of advice on these from the amazing GoodGuyDan, who was very gracious and responsive to my questions.

Detail of Char - I couldn't get a sharp image here, but you get the gist of it. I think I did a pretty reasonable job of painting a figure that's roughly only 1.5x the height of a grain of rice.


Zaku II pilot poses - in the series, it's common for mobile suit pilots to board by stepping in and out of the hand. I pulled this pose (and most of the others) from the manual and product box, though I wasn't able to get the hand all the way down. The hip skirt armor kept popping off, and I ultimately had to super glue it in place to even get this much flexibility.


Char's Zaku II pilot poses - Char's custom mobile suit comes with this fun hangar elevator platform.


Char's Zaku II action poses: Rifle - the lenses for both kits were done using the same candy technique as the mono eyes. The obvious highlight of each rifle is the hand painted drum magazine. I couldn't bear to hide the detail work in a closed magazine, so I left the lid open just a touch so if you view the drum from the side you can see the edges of the bullets.


Char's Zaku II action poses: Heat Hawk - everything about these axe blades was unintentional. I candy coated them in yellow, then did a freehand clear red over the top to try to achieve a gradient effect. I think my clear red was under-thinned, as I got a lot of spattering, though I felt the effect was actually kinda cool. Next I masked off the blade and set to spraying the rest of the axe - however, I clamped my alligator clips to the masked blades, not realizing they would bite into the paint underneath (I thought the masking tape would protect the underlying paint sufficiently). When I unmasked everything, I saw that the clips left gouges in the blades. I was annoyed at first but realized that I had inadvertently created some really great-looking battle damage.


Zaku II action poses: Rifle - I had trouble getting the painted lens to fit in the scope on this one, so it ended up at a crooked angle and some of the candy coating chipped. Another happy accident, as it came out looking like more battle damage.


Zaku II action poses: Heat Hawk - I particularly love this pose.


Zaku II action poses: Bazooka - it was very tricky to pose the bazooka over the shoulder like this. It kept popping out of the hand peg, which is much smaller and shallower than the more modern pegs used on current MG kits today.


Char's Zaku II action poses: Bazooka

Zaku II / Char's Zaku II - full kits and accessories.


Though slightly less stable and simpler than the newer MG RX-78-02 Gundam: The Origin, these twins were a fun project that was much easier to work on simultaneously than separately. Despite their age, I think the MG 2.0 Zaku II still holds up.


Battle shots - I was all done shooting and had posed the two Zakus for display in my Ikea Detolf case, but I had to take a few more photos of the duo in action against Amuro's Gundam! Tricky to fit all three in my narrow photo area, but still fun.

Final poses in my display case - I even did a little setup using spare Action Base 4 parts to show the unused weapons. accessories, and pilot figures.
Comments
Post a Comment